Client management in the Claim Manager
This guide is aimed at administrators of the Claim Manager and describes step by step how new clients can be created in the system.
The client management in the Claim Manager enables precise control of the access rights of the processors to the clients. By carefully assigning these rights, you ensure that each user can only use the tenants relevant to their tasks.
1. Open Client Administration
To create new clients or manage existing clients, you need to navigate to the "Client Management" area. You can reach this in two ways:
On the Claim Manager home page, click the "Administration",
orFrom the Start menu, navigate to "Settings → Administration".
Both paths lead you to the administration area. There you can switch to the tab via the menu bar at the top "Client Management".

2. Create a new client
In the ribbon at the top left, click the "New client". This will open an input window in which you can enter the required information for the new client. In this window, you can specify the name, address, and the desired segment (module), among other things.
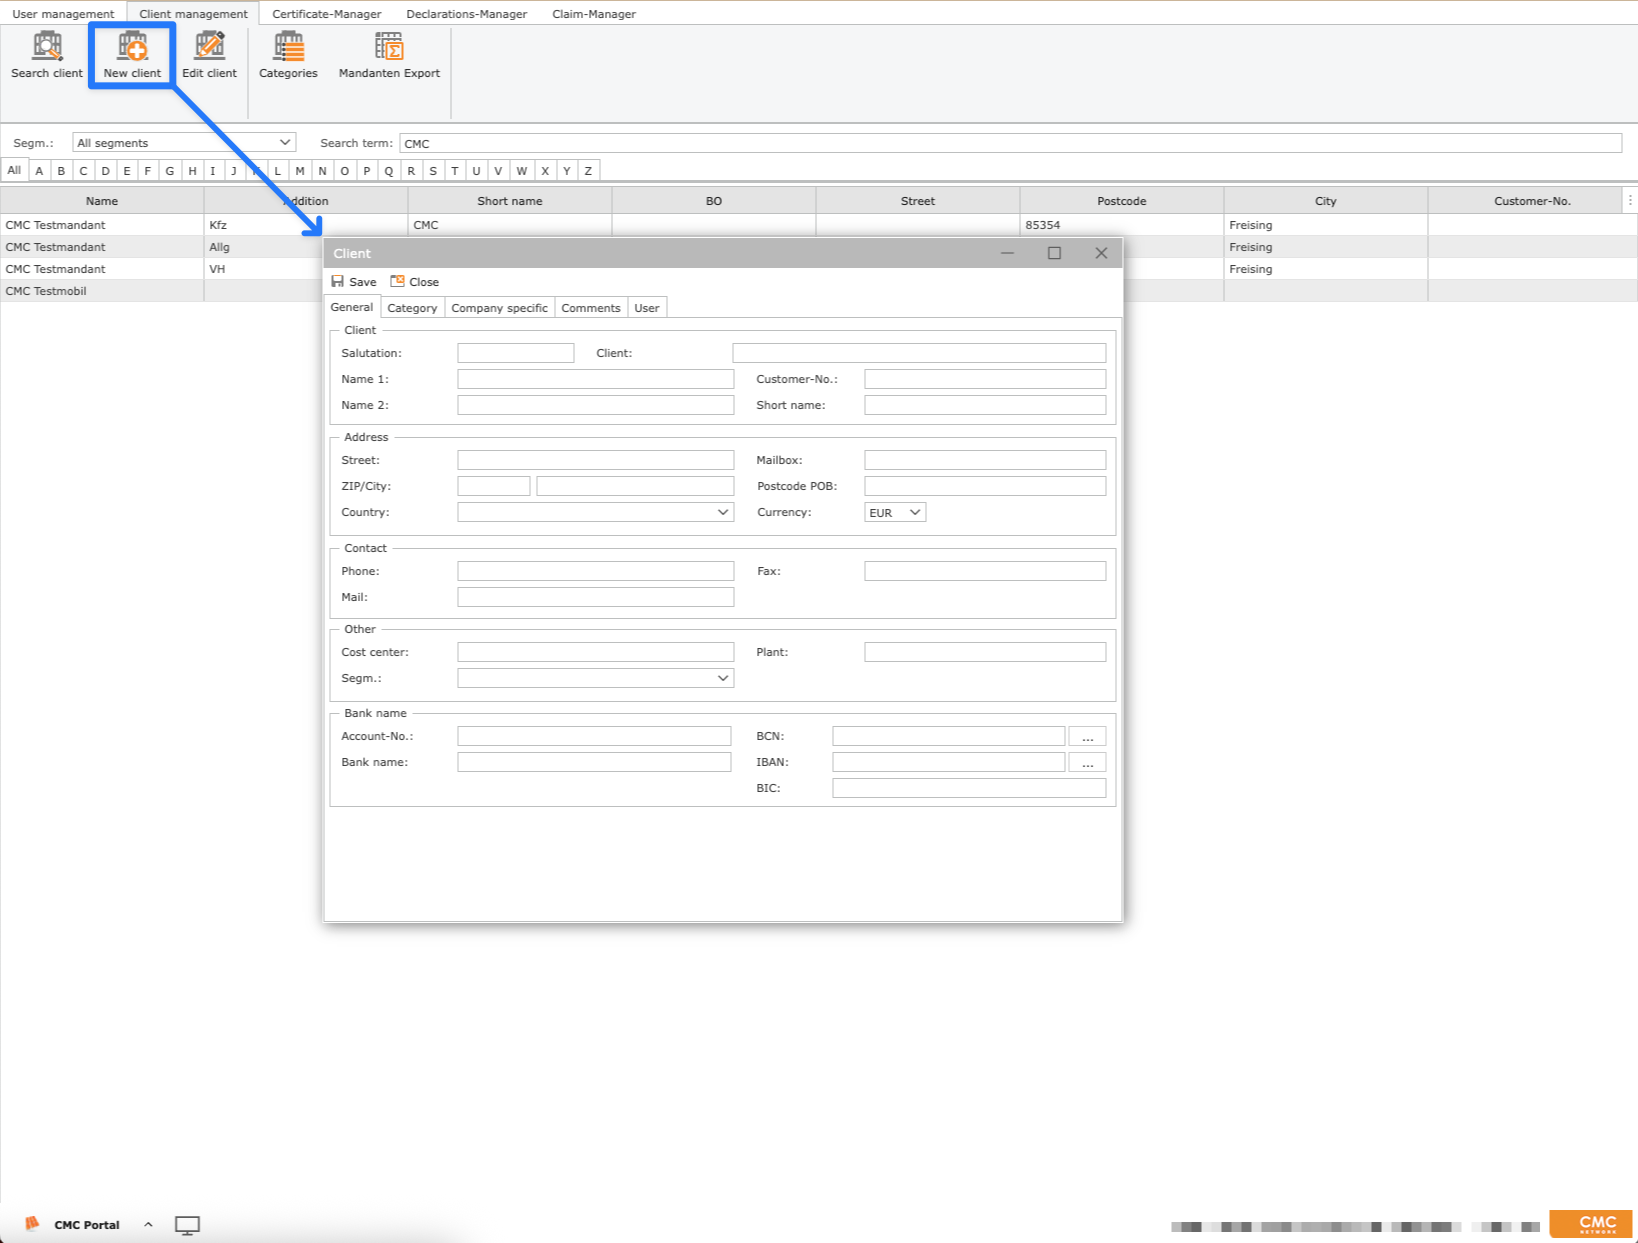
Mandatory fields of your system are highlighted in orange.
3. Assign category / client group
In the tab "Category" you can assign a desired group to the client.
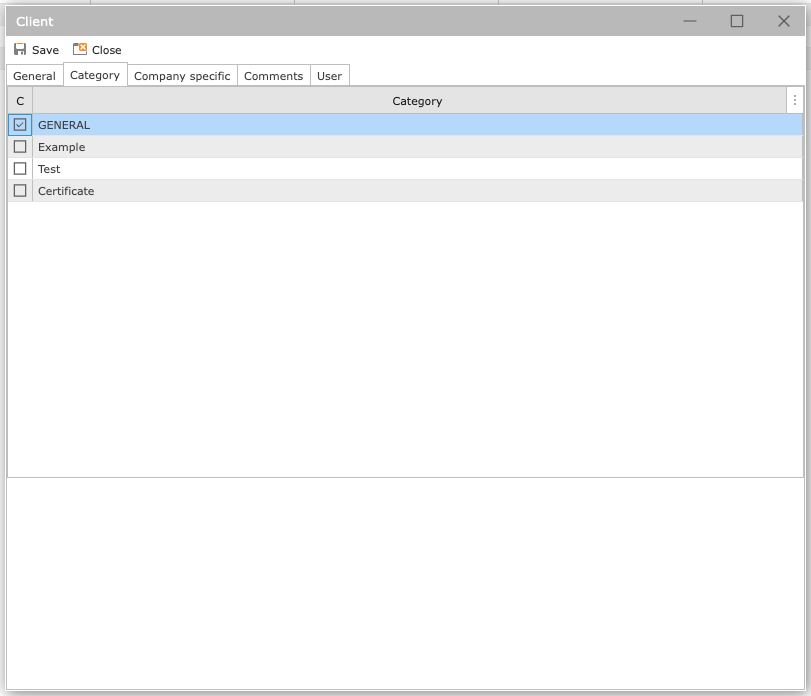
The selected group influences, among other things, which templates are available for the client to choose from later, or whether it is displayed when the group is selected.
4. Assign access rights
In the tab "User" you can assign specific permissions to existing users for this client. The following rights are available to you:
R = Reading rights
W = Writing rights
X = Access to reports
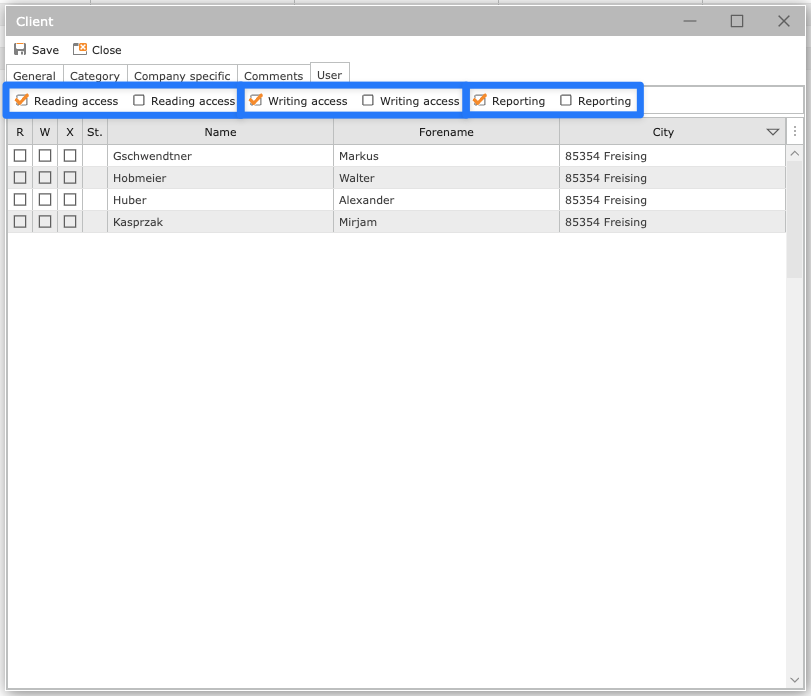
To manage the rights efficiently, you can use the buttons above the client list. This allows the respective authorizations to be set for all users at the same time.
5. Save client
Once you have provided all the required information, assigned the segment and assigned the desired permissions, complete the process by clicking on the button "Save".
This creates the new client in the system.
The newly created client will only be available in the Claim Manager after the next login.