Create individual reports
In this article, we explain how you can create your own reports within the Reporting.
The setup of the individual reports is identical for all segments and subgroups. For our example, we set up an individual report for "Building/Property".
Open the Individual reports section
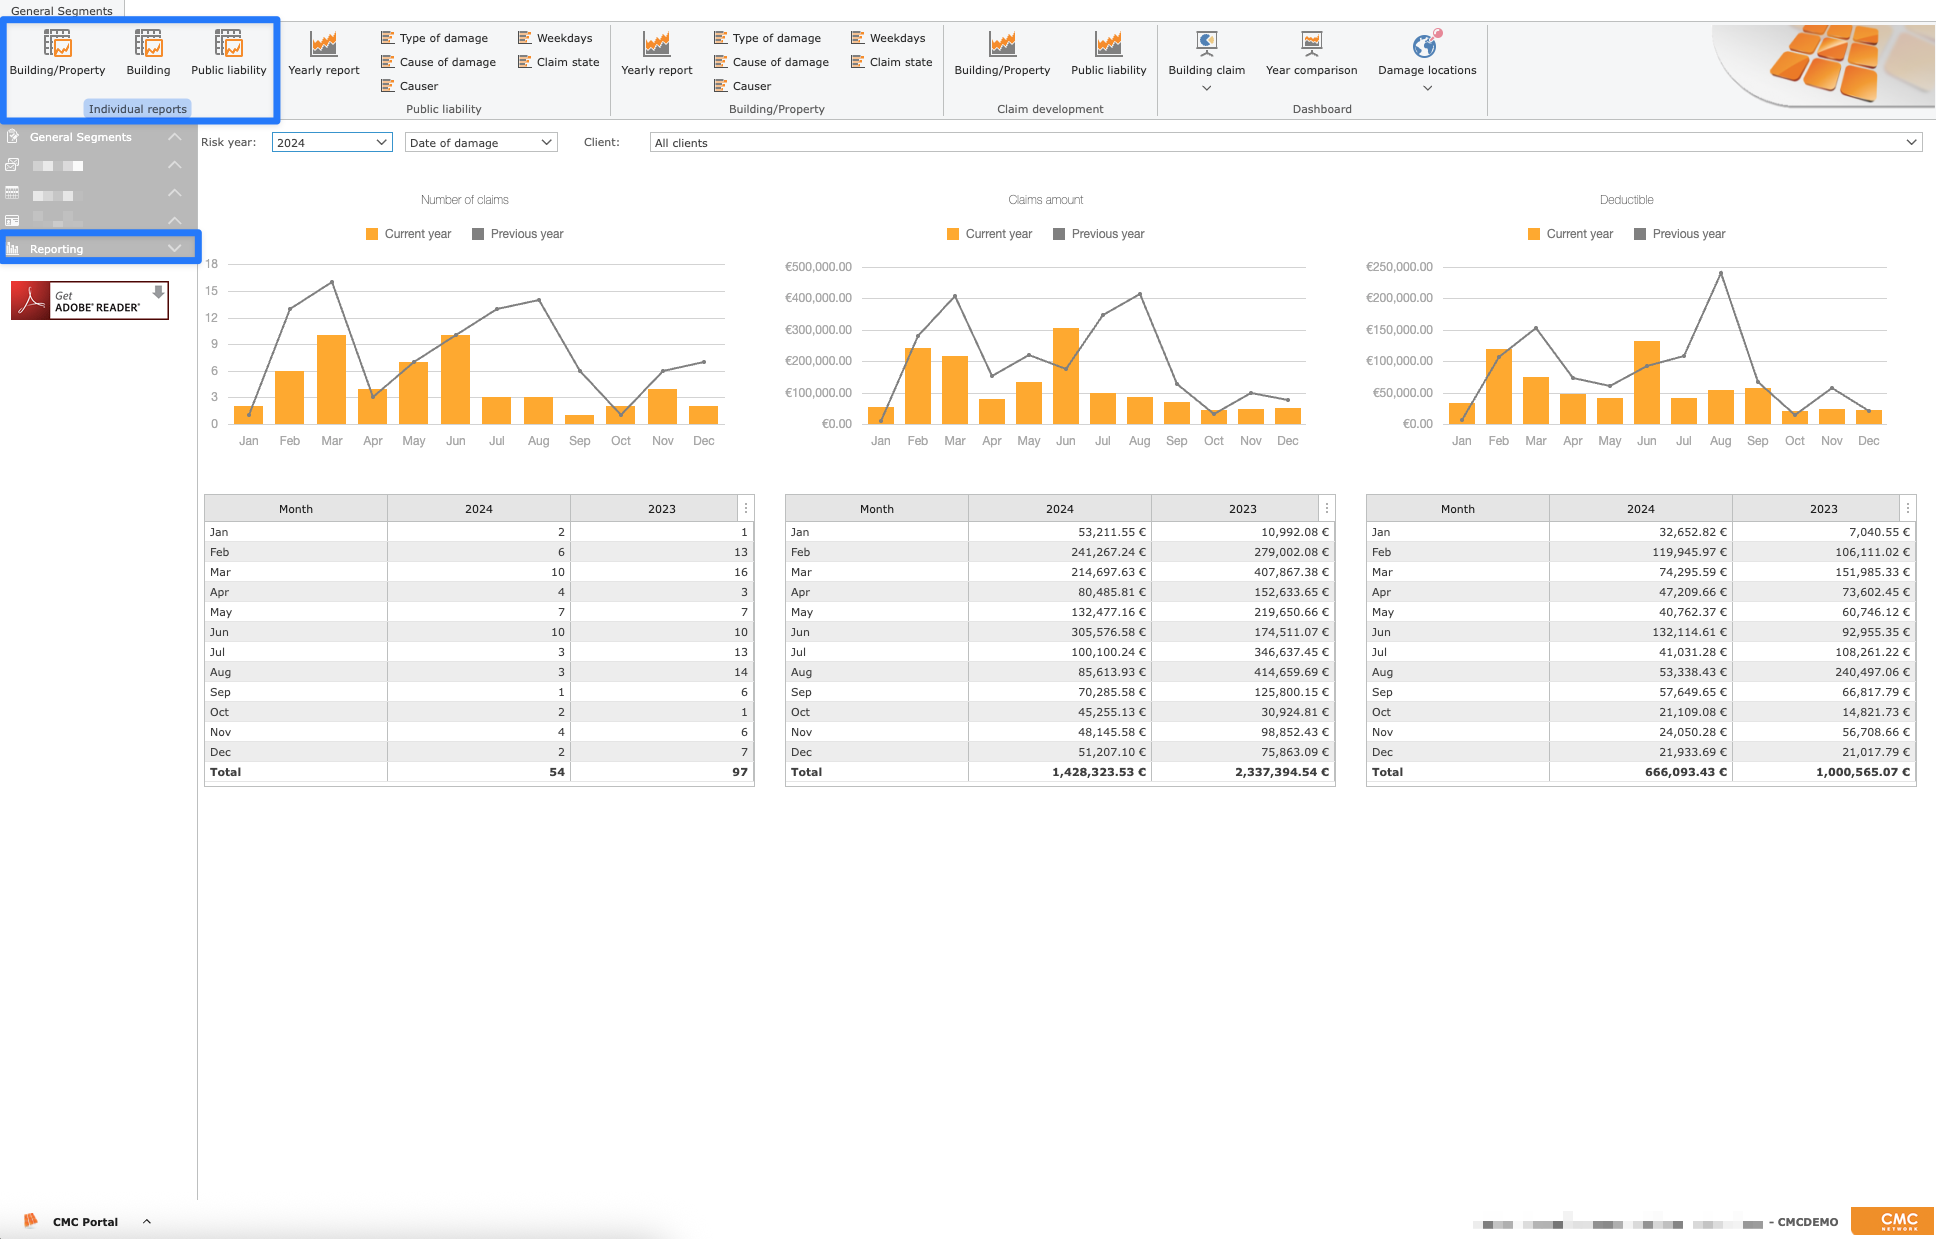
Open "Reporting" in a category (e.g. General Segments). Either via the side menu of the category or the Reporting panel on the starting page.
At the top left is the "Individual reports" section, here you can select a reporting group, e.g. "Building/Property"
1. Start creating
The button <New> can be used to configure a new report. By clicking a new window will open. On the first page "General" you can now specify the name, a creation date, a description, the owner (pre-assigned to the user), the executability, as well as an e-mail sending.
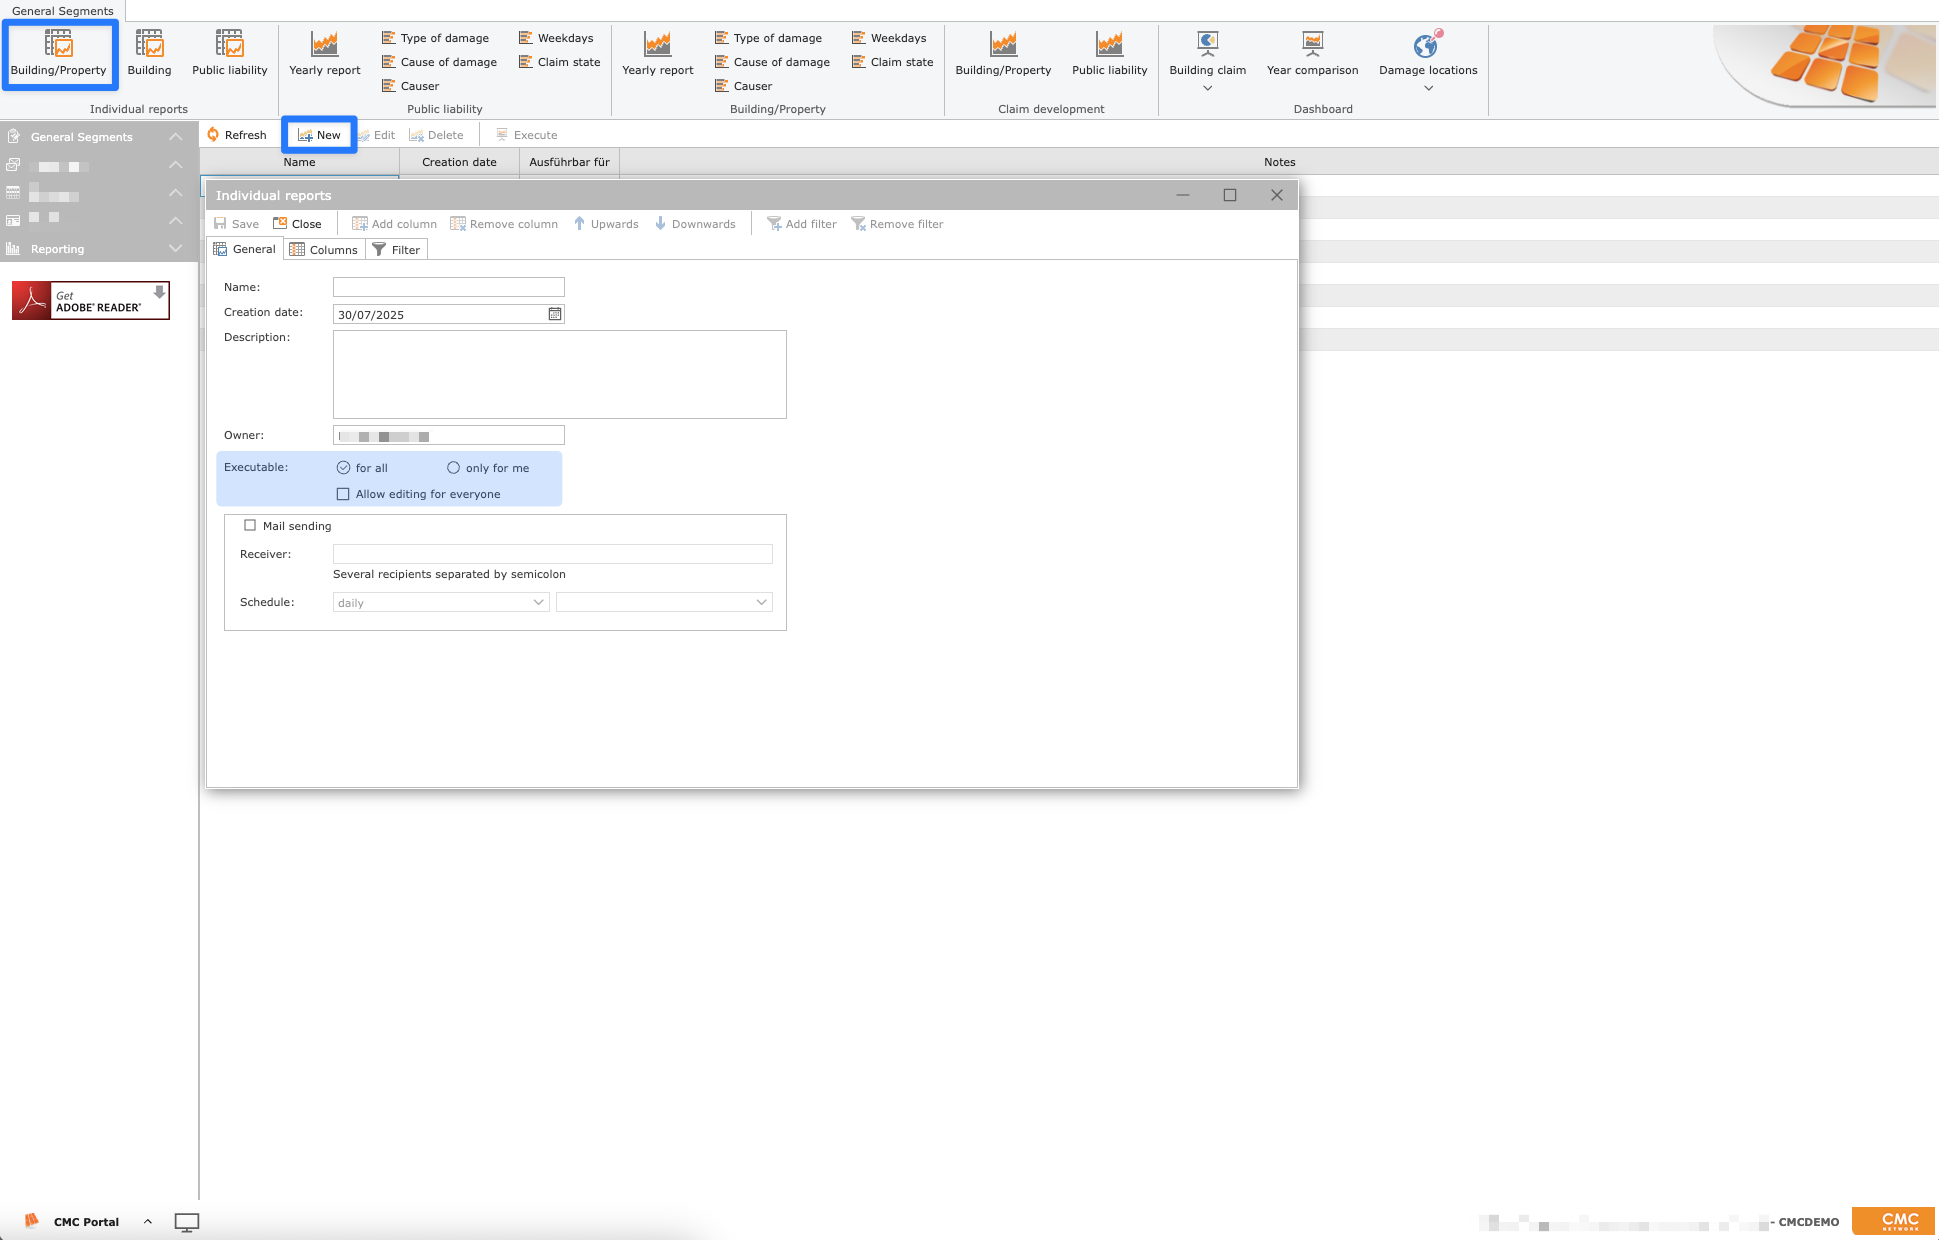
With "Executable" you determine who is allowed to see and execute the individual report
You can also allow editing for everyone
2. Set up e-mail sending
If you want to automatically receive an e-mail on a regular basis, you can enter one or more e-mail addresses (separated by a semicolon) and select a cycle.
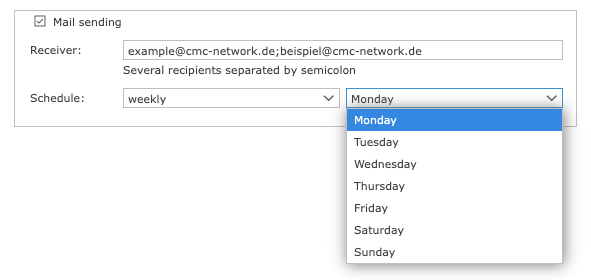
For example: Weekly on Mondays
3. Select columns
On the second page (the "Columns" tab) you can choose and order your columns from the available fields. By 'double-click' in the left list, the field will be added as a column.
Position 1 = column A, position 2 = column B, position 3 = column C, etc. ...
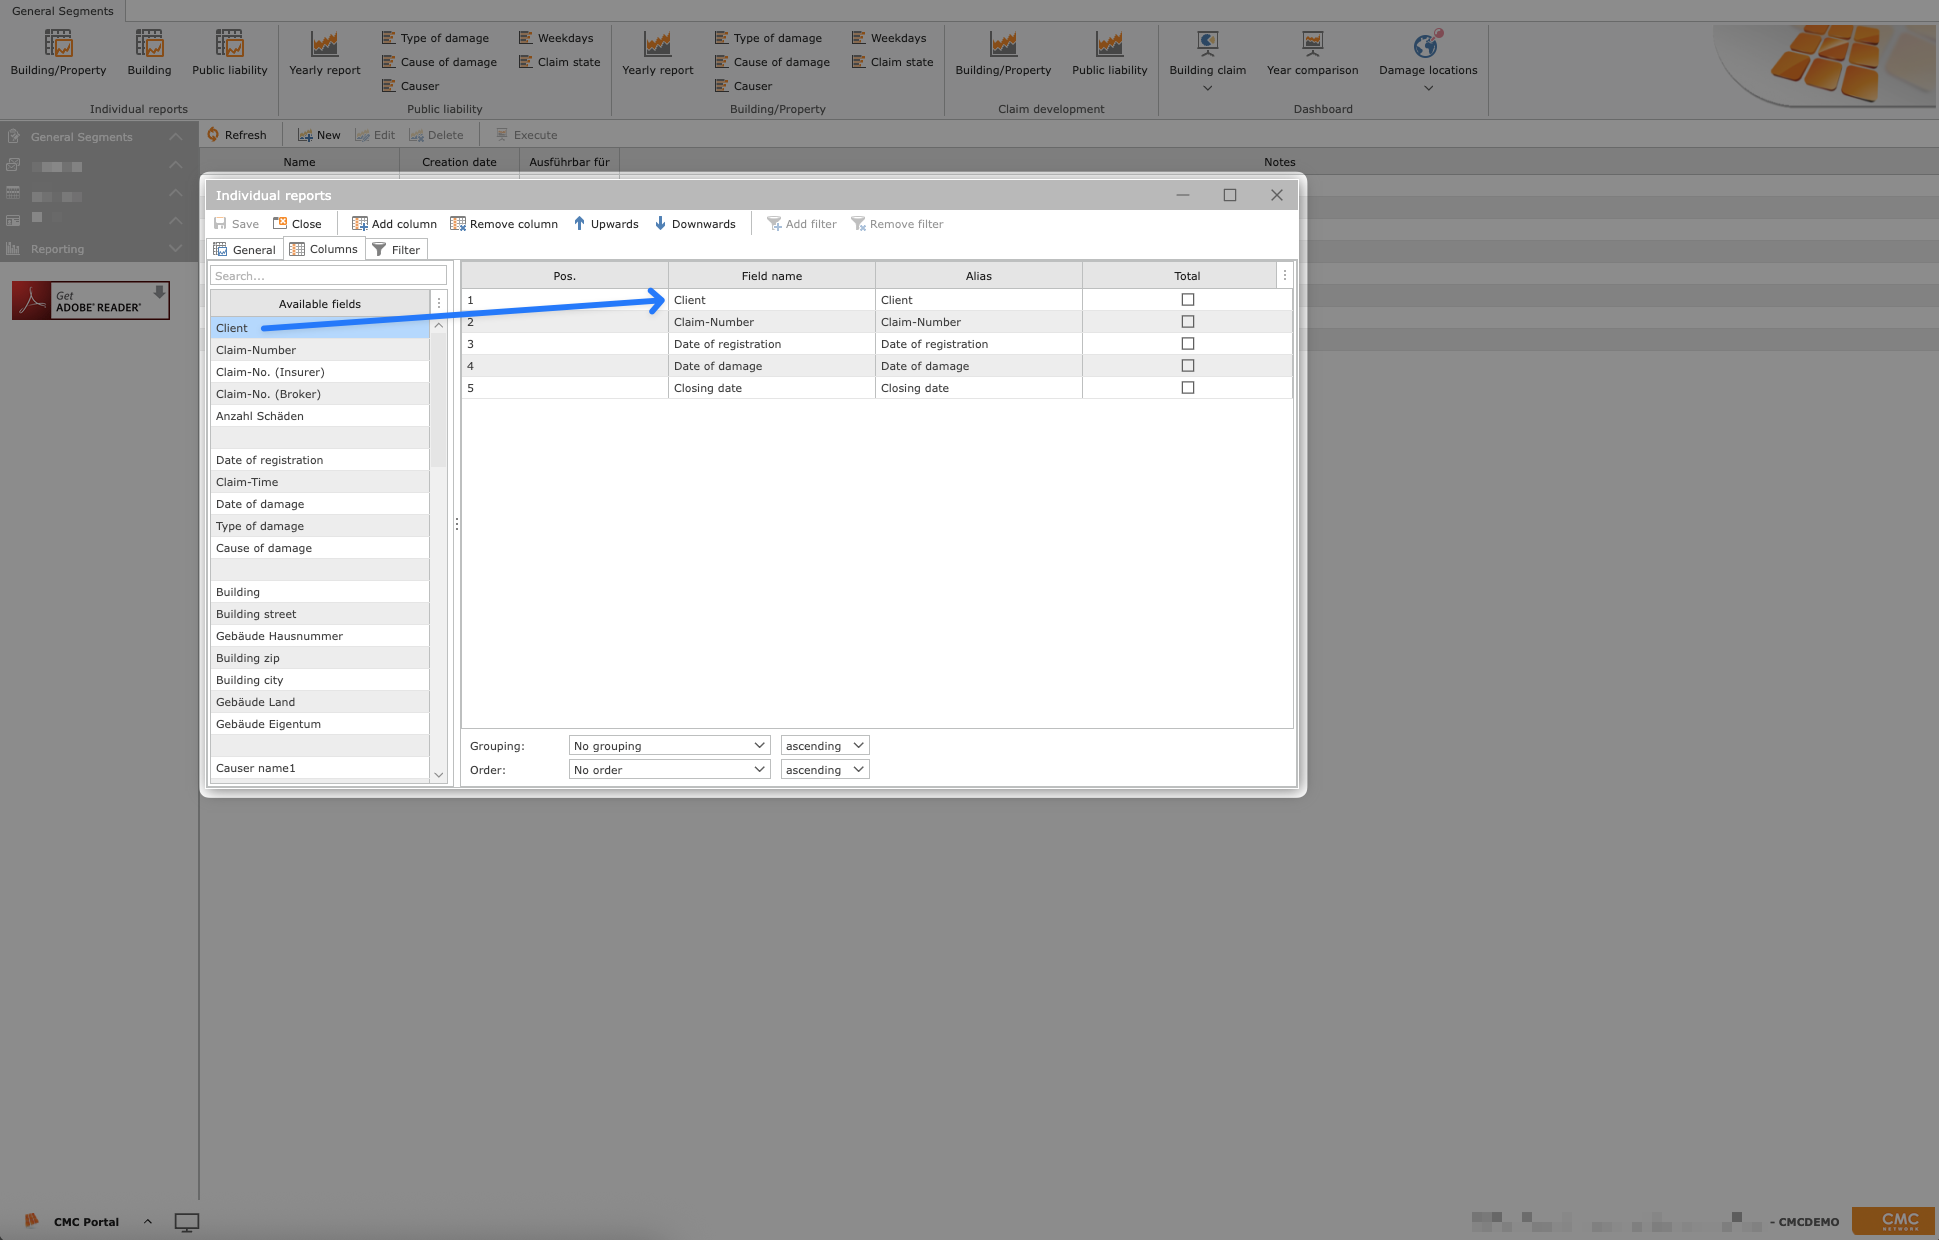
If you want to delete or reposition a selected text field, select it by simply clicking on it in the right-hand overview and use the buttons above 'Remove column' or 'Upwards'/'Downwards'
4. Define filters
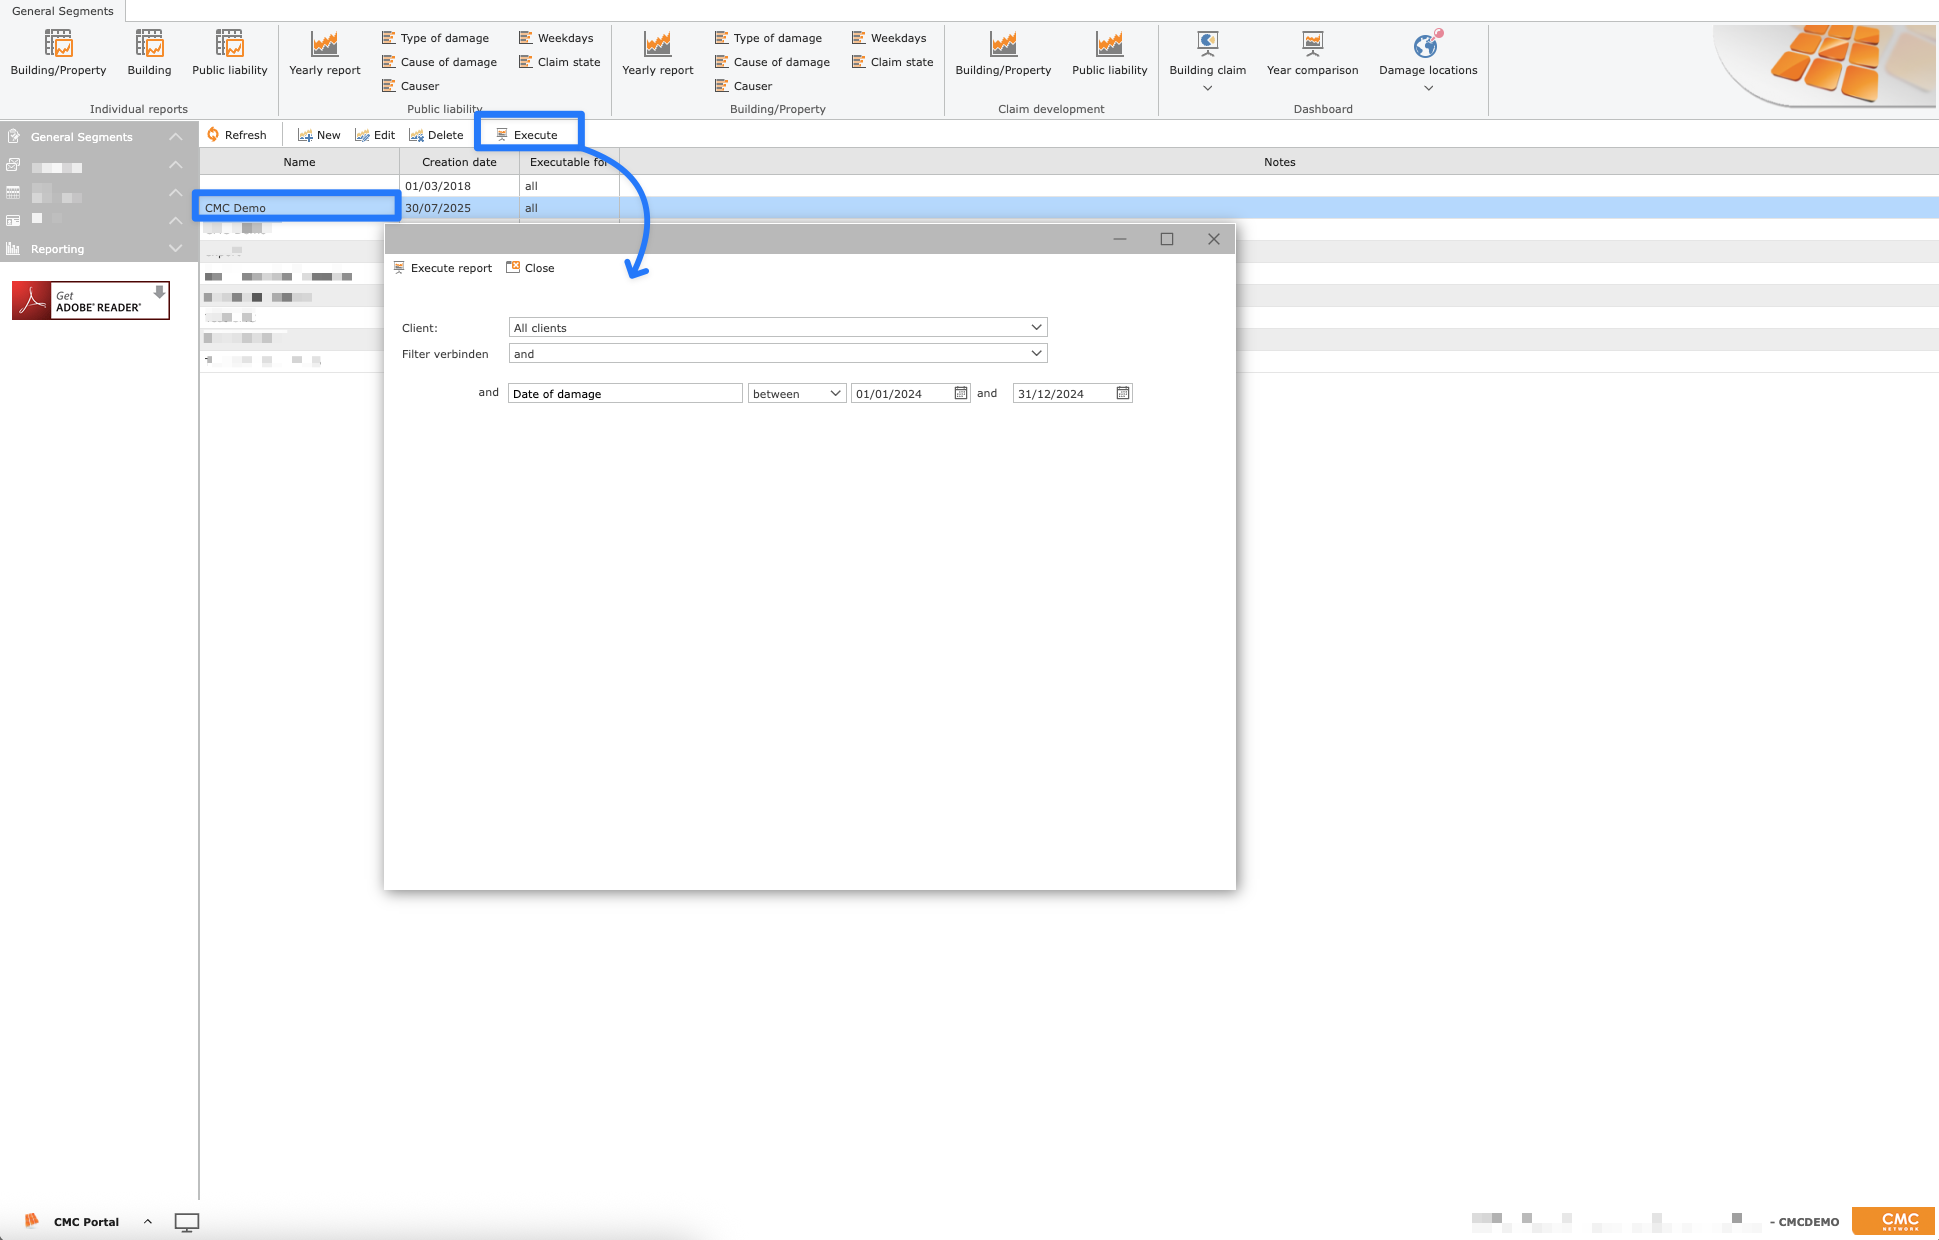
On the third page (the "Filter" tab) you can assign one or more filters. These will be used for future executions.
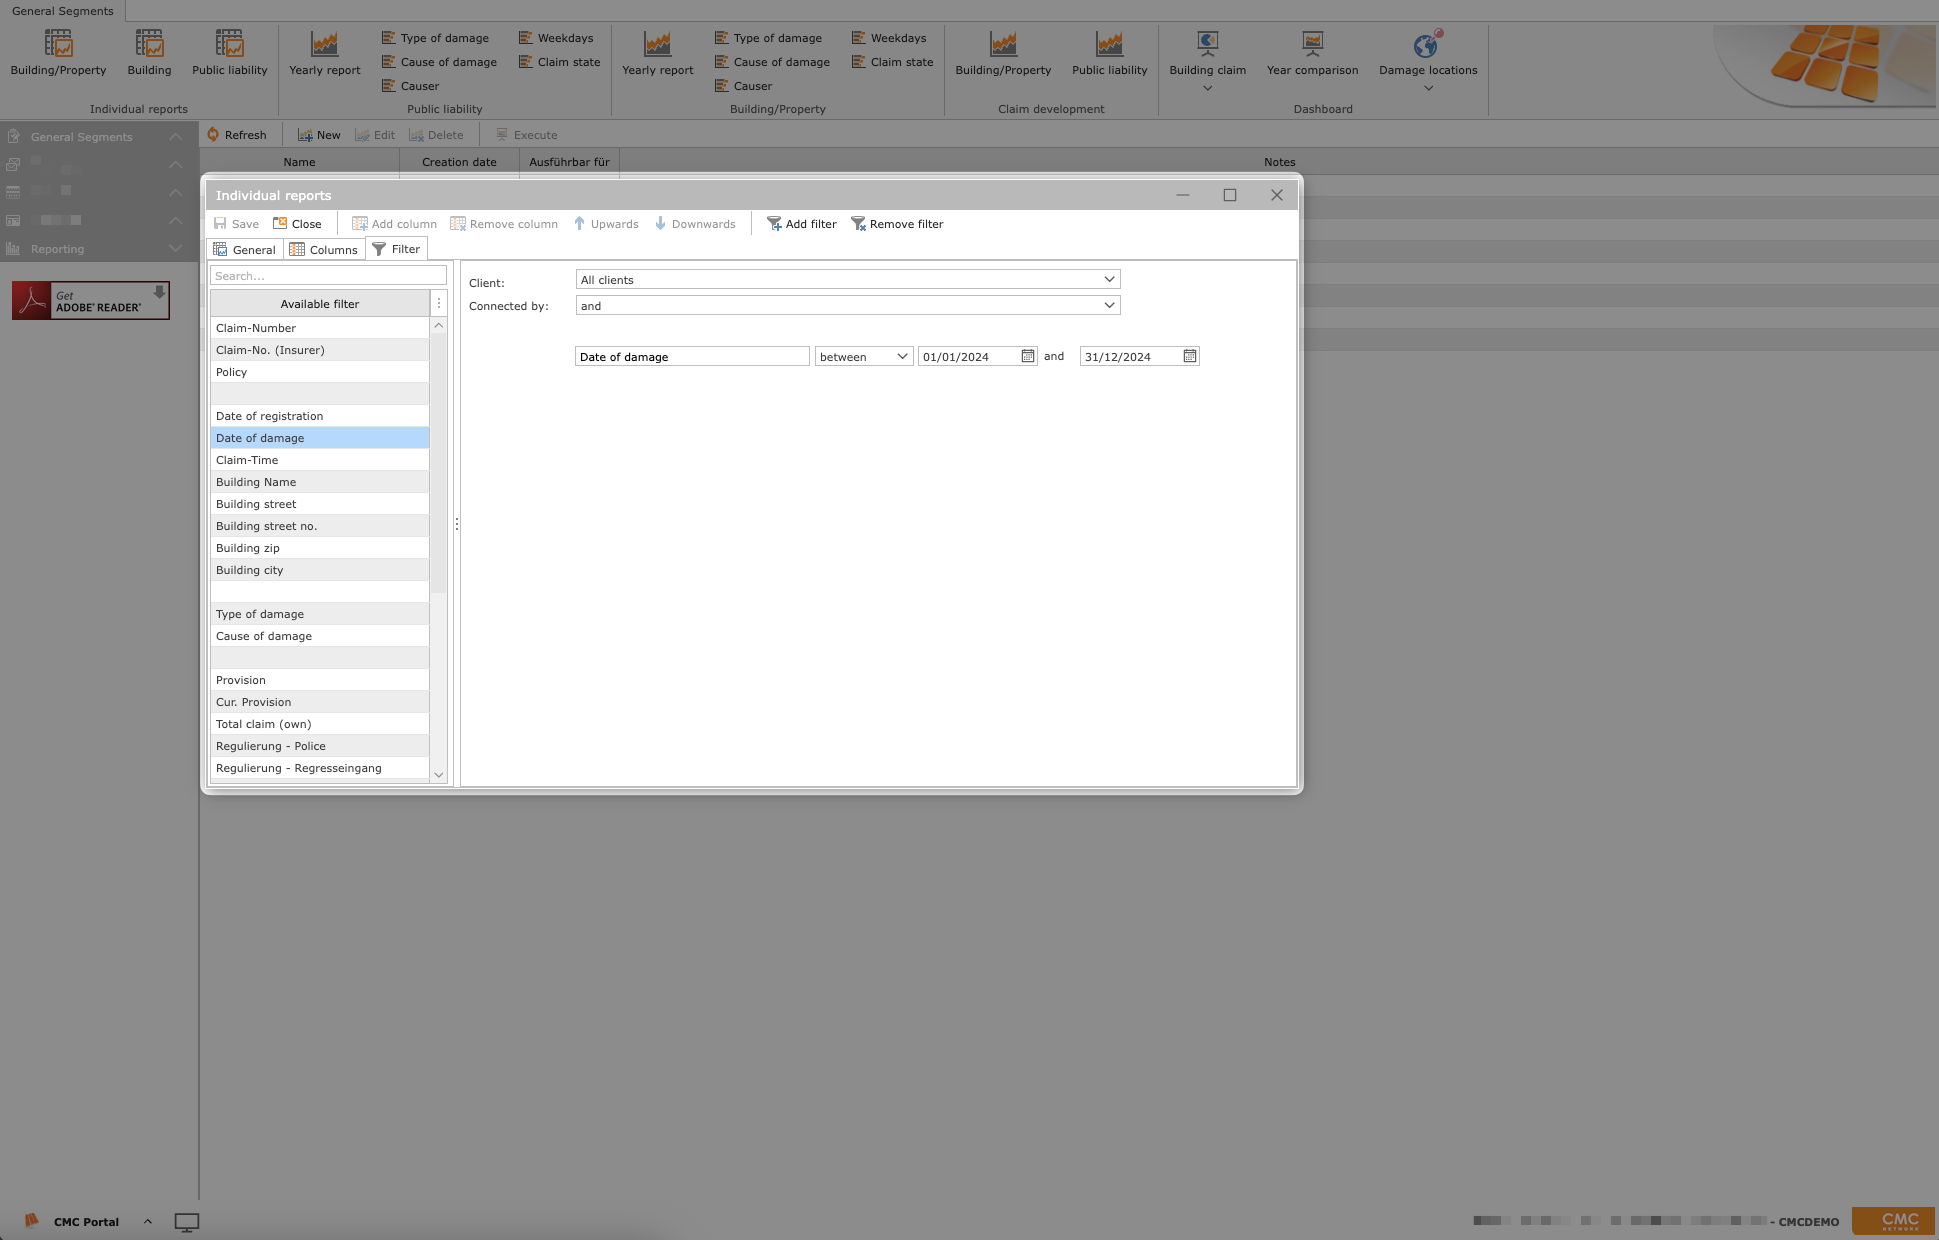
The filters can be adjusted again before running manually. In the example shown above, the client selection and the claim date can be adjusted.
The second selection "Connected by and/or" defines the behaviour of all filters.
and filters: "Claim date: 01/01/2024 - 31/12/2024" AND "Damage location = Freising" outputs all claims for which both, the claim date between 01/01/2024 and 31/12/2024, and the damage location is Freising.
or filter: "City of damage: Freising" OR "City of damage: Munich" outputs all damage that has Freising or Munich as the place of damage.
⚠️ "City of damage: Freising" AND "City of damage: Munich" won’t work, because for a claim, there can only be one damage location.
5. Save and run
After saving, you can run the evaluations manually at any time.
If you have set filters, you can now adjust the selection.