Single-Sign-On (SSO): Setup
App registration
First, we register an OAuth 2.0 application in Azure Active Directory.
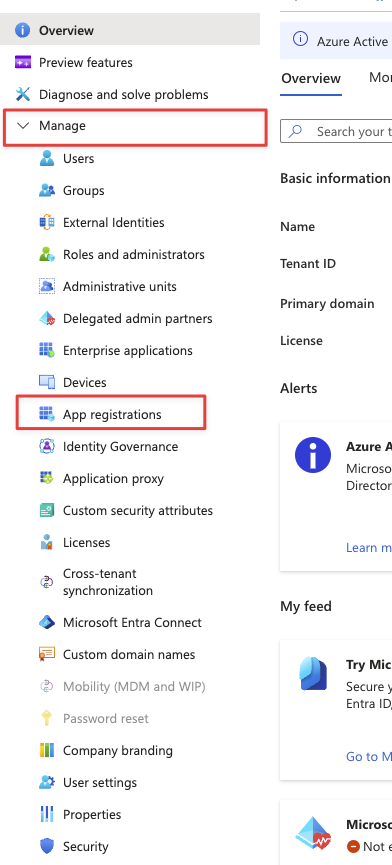
To do this, we call up the Azure portal with https://portal.azure.com
Now we open Microsoft Entra ID either via the Azure services or via search

Now we click on App registrations in the menu on the left under Manage
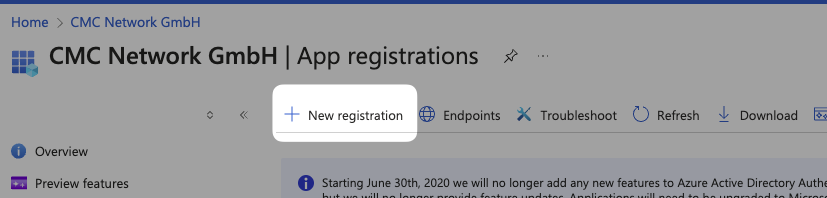
Then we select New registration
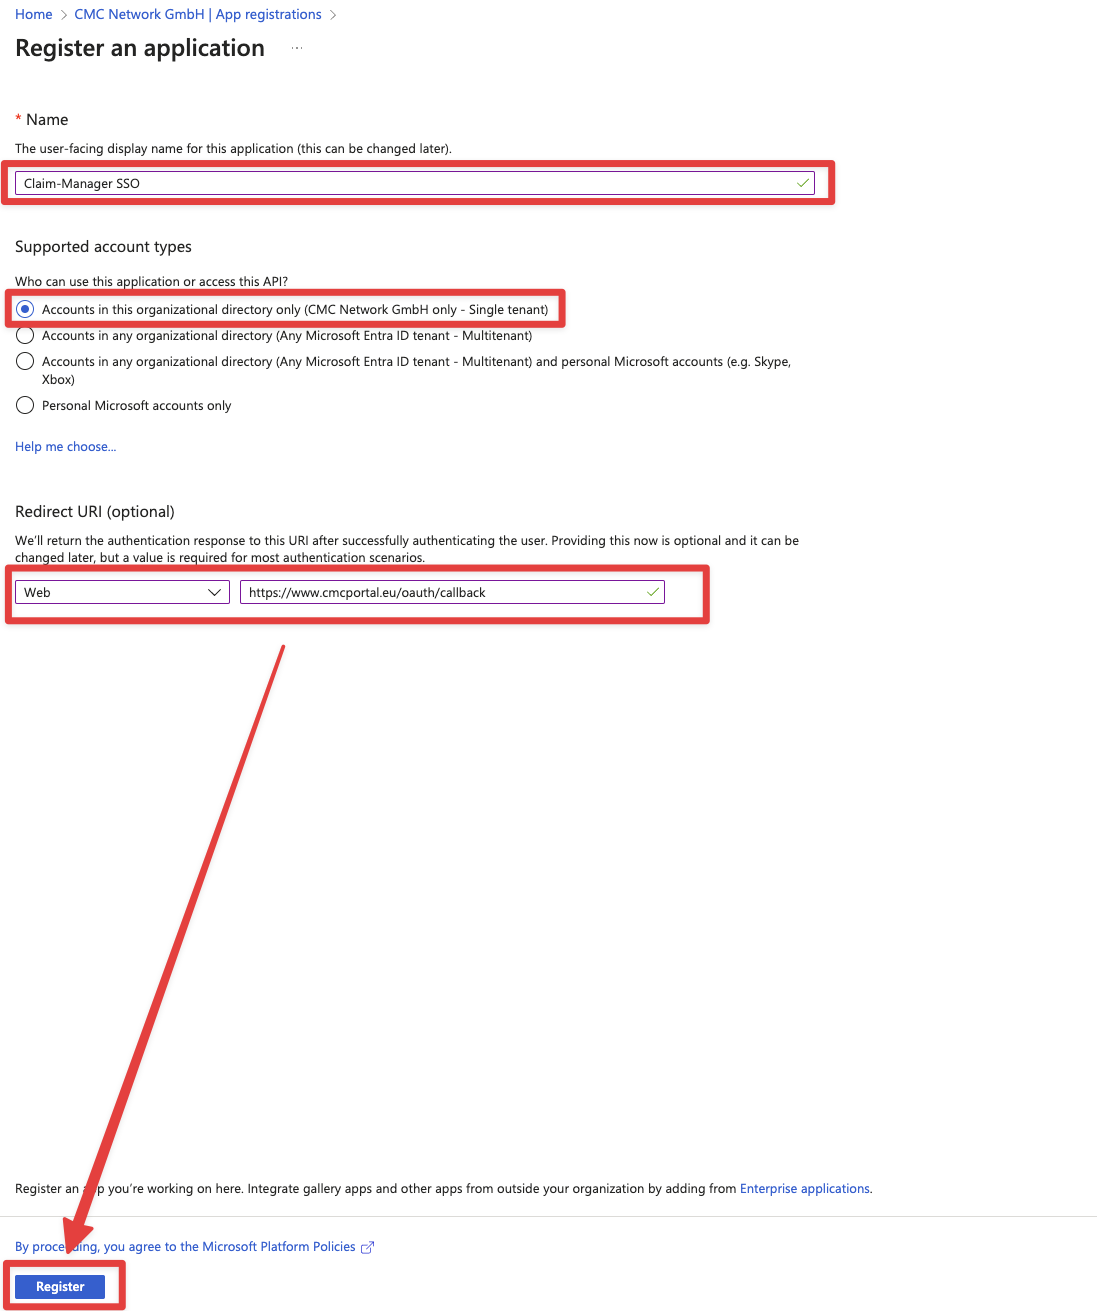
Here we fill in the name so that we can later recognize what the registration is for.
For example, Claim Manager SSO could be used as a recommendation.
For supported account types, the first option Accounts in this organizational directory only is usually sufficient
The redirect-URL is specific to your environment. The CMC Support will tell you the redirect-URL to use.
If the CMC-Support did not tell you your redirect-url yet, please contact the CMC Support to ask for it.
Then click on Register at the bottom of the page
App permissions
Congratulations! We have successfully registered our application in Entra ID. Now we still need to grant the application permissions so that the registration works smoothly.
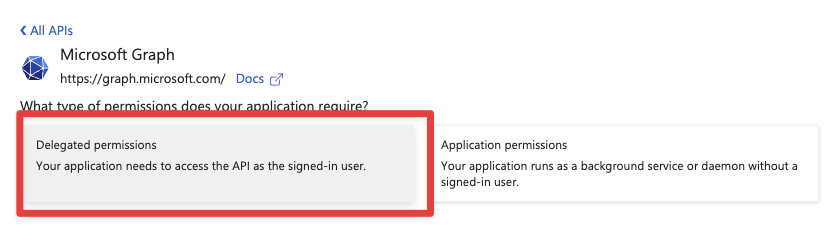
To do this, we click on API permissions in the menu on the left, then on Add a permission, then on Microsoft Graph and then on Delegated permissions.
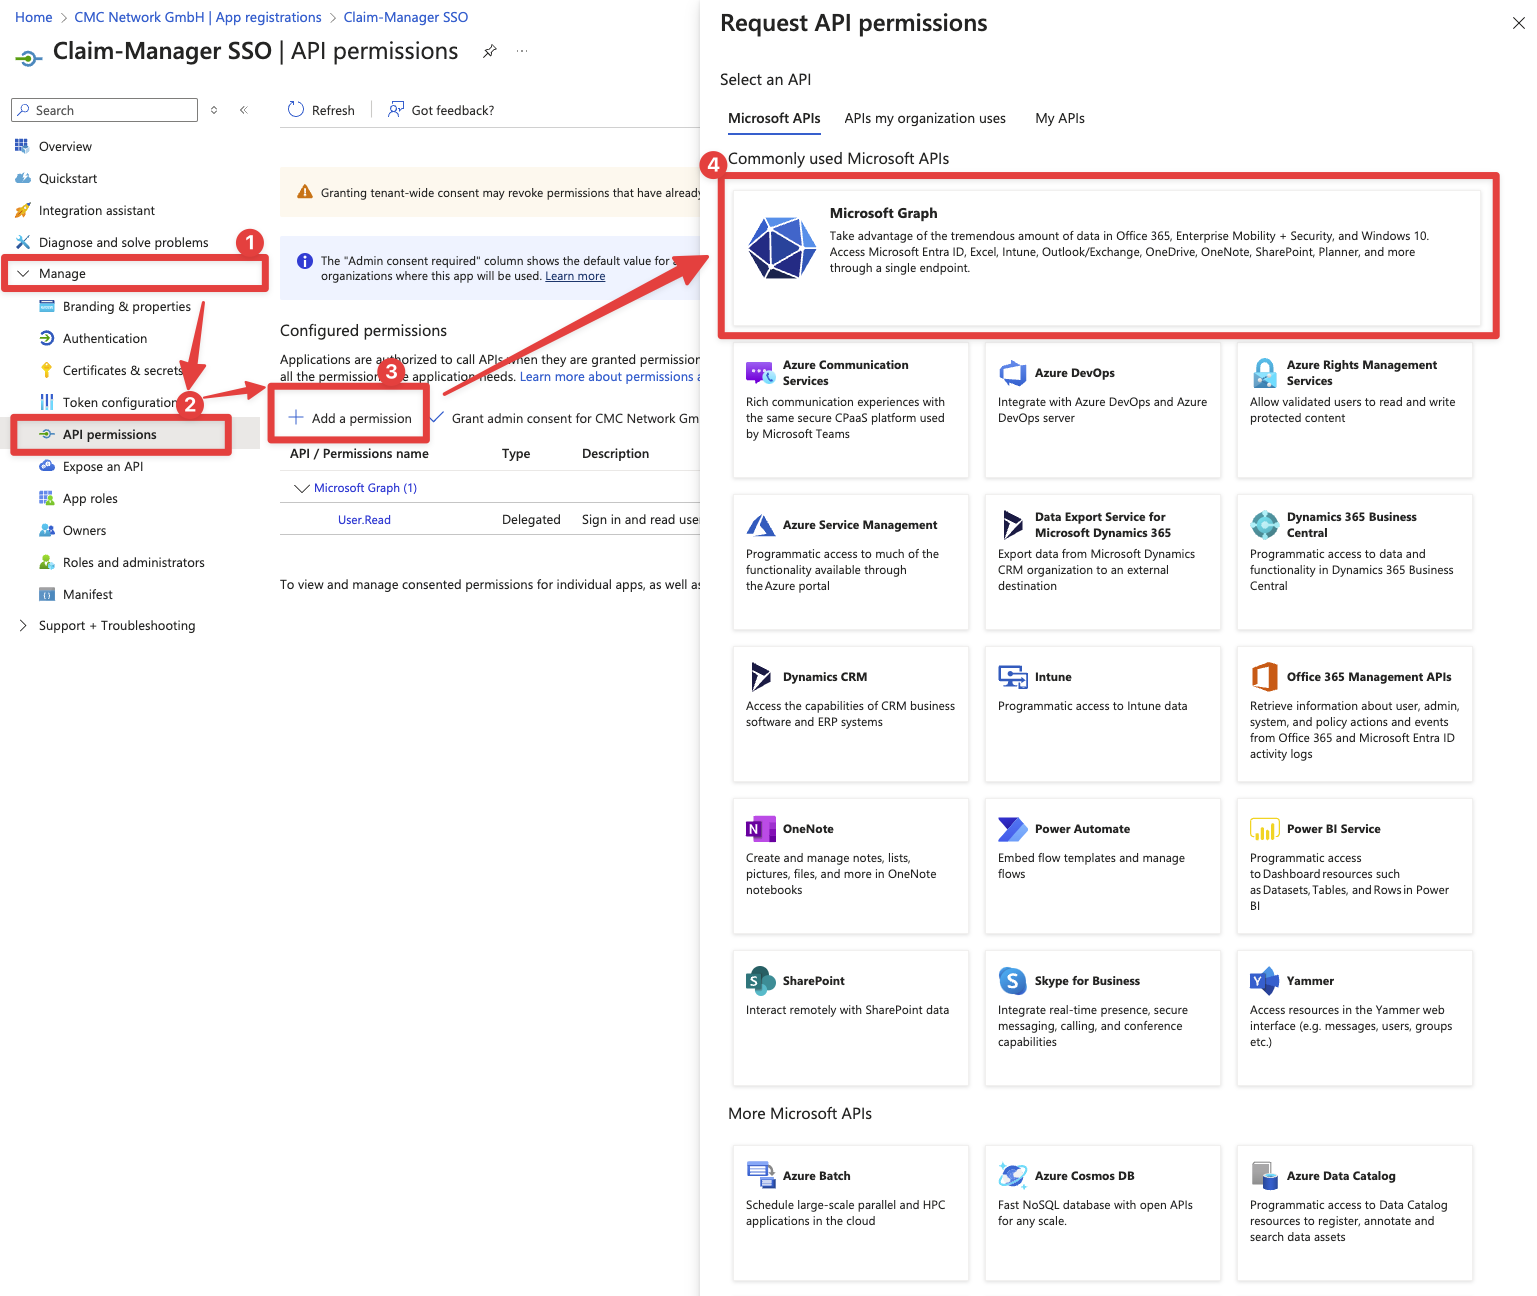
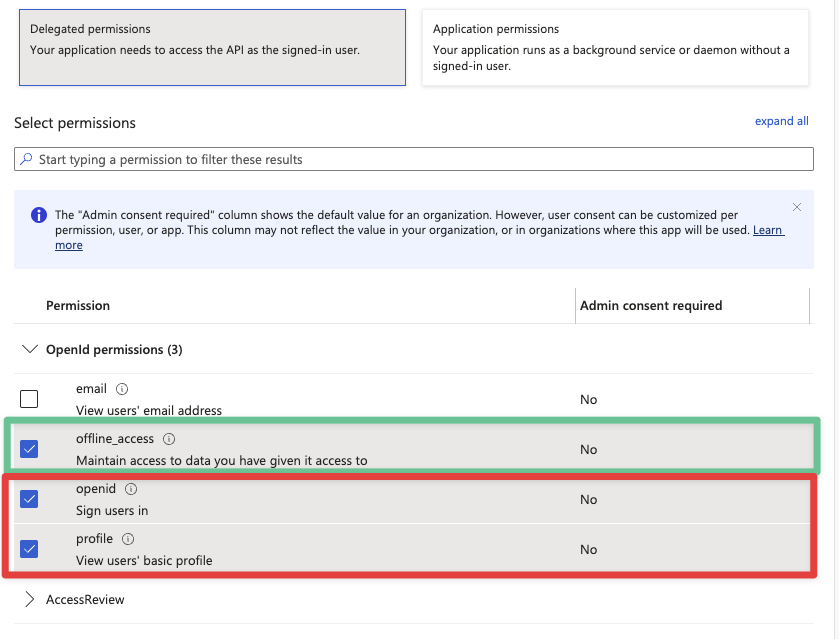
The following permissions must be set as a minimum:
openidprofileuser.read
offline_access is also required for some use cases.
Create a secret
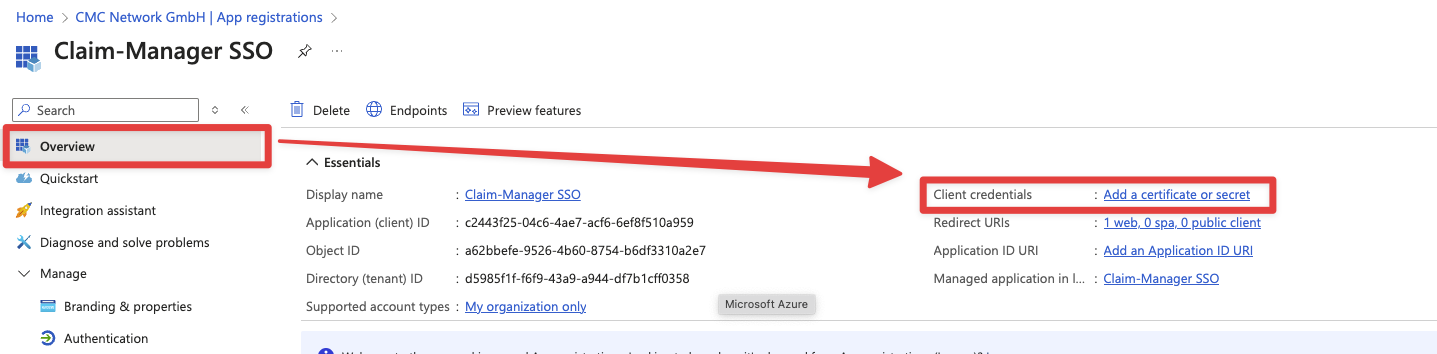
After we have created the authorizations, we still need to create a secret.
To do this, we go to the application overview and click on the link Add a certificate or secret
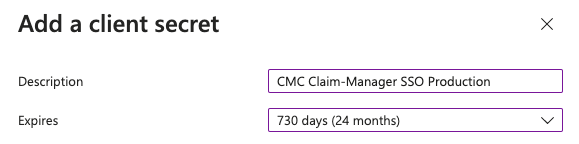
Now let's add a new secret key
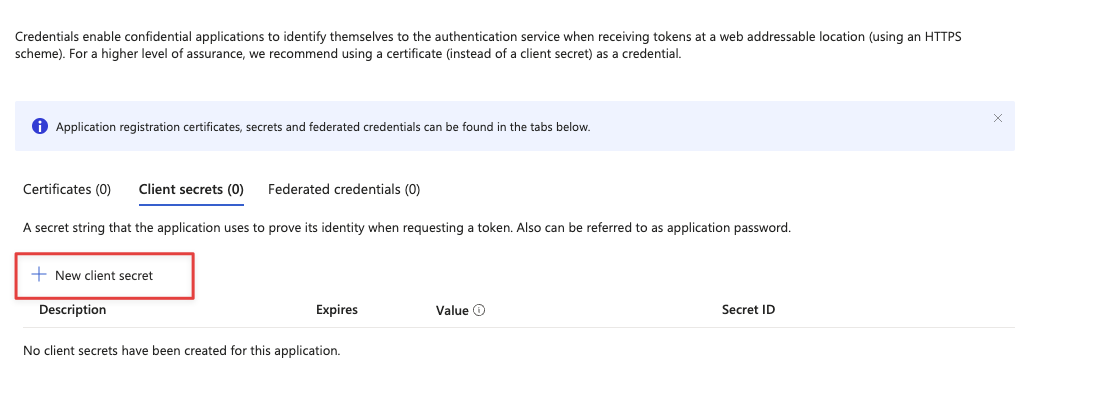
We assign a meaningful name, such as CMC Claim-Manager SSO Production
And we assign a suitable expiry date for Expires. The length of the expiry period depends on your company's internal security regulations. Unless otherwise specified, we generally use 24 months.
The secret is then added to the list of secrets

Please be aware, that the value of the secret is displayed once only
Now we make a note of the value of the secret to pass on to CMC.
Please be careful to copy the value and not the secret ID
Pass on data to CMC for setup
With the successfully created application and the necessary rights, CMC can now configure the Claim- Manager. The following information is required for this:
We go back to the application registration overview and search for the following values:
Application ID
Directory ID
Value of the previously created secret (not visible in the overview screen)

This data can be sent on to CMC so that it can be integrated into the Claim Manager.