User management in the Claim Manager
This guide is aimed at admins of the Claim Manager and describes step by step how new users can be created in the system as well as how to assign them the required permissions.
User management in the Claim Manager enables precise control of access rights to programs, clients, and functions. By carefully assigning these rights, you ensure that each user can only use the areas relevant to their tasks.
1. Access to User Management
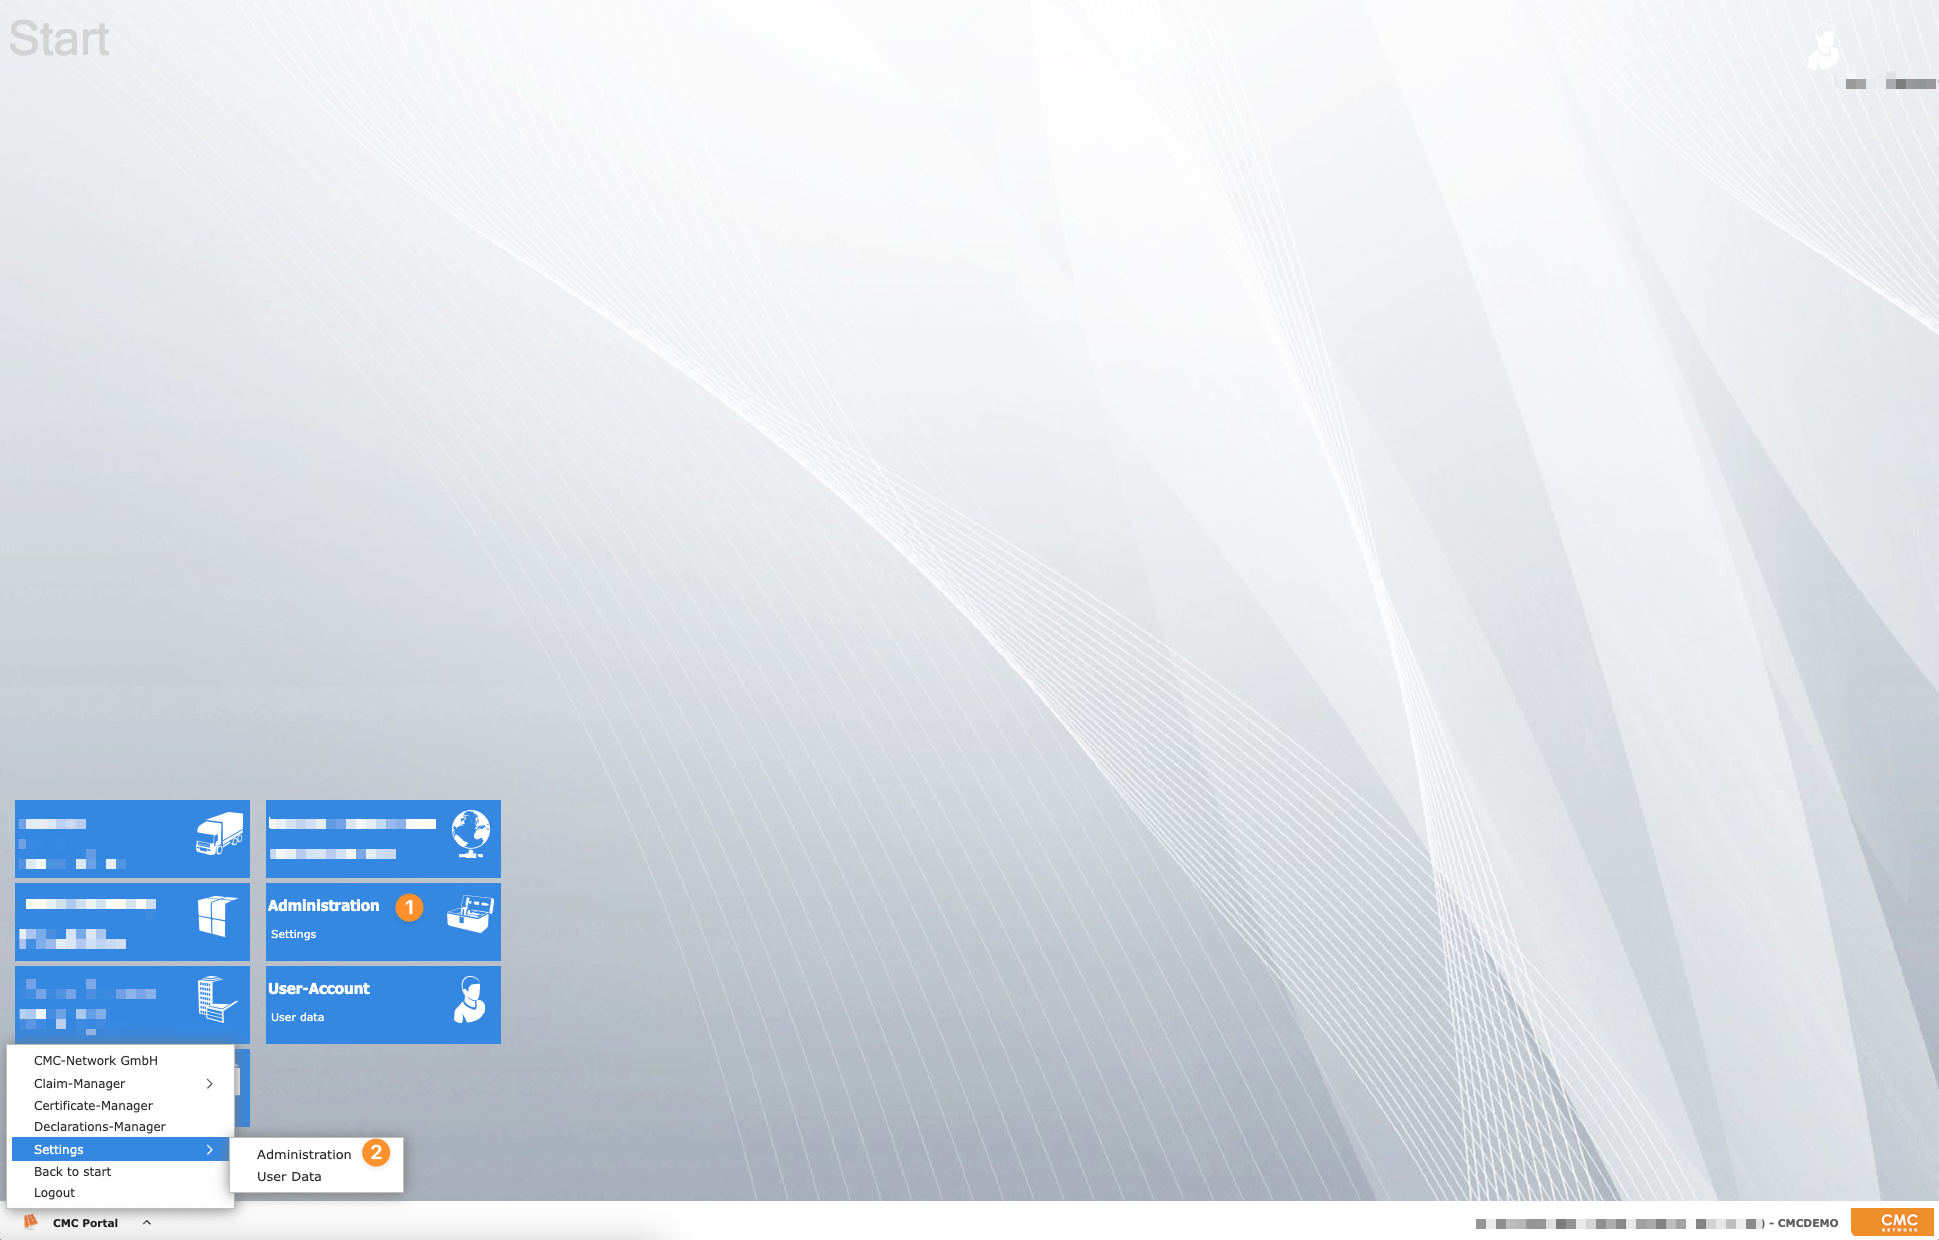
To create new users or manage existing users, first open the "User management". You can reach this in two ways:
On the Claim Manager starting page, click the "Administration" panel,
orFrom the Start menu, navigate to "Settings → Administration".
Both ways will take you directly to the management interface, where you can create, edit, or delete user accounts.
2. Create a new user
In the ribbon at the top left, click the "new User" button. This will open an input window in which you can enter the required information for the new user account.
You can specify the name, the e-mail address and the desired user group, among other things.
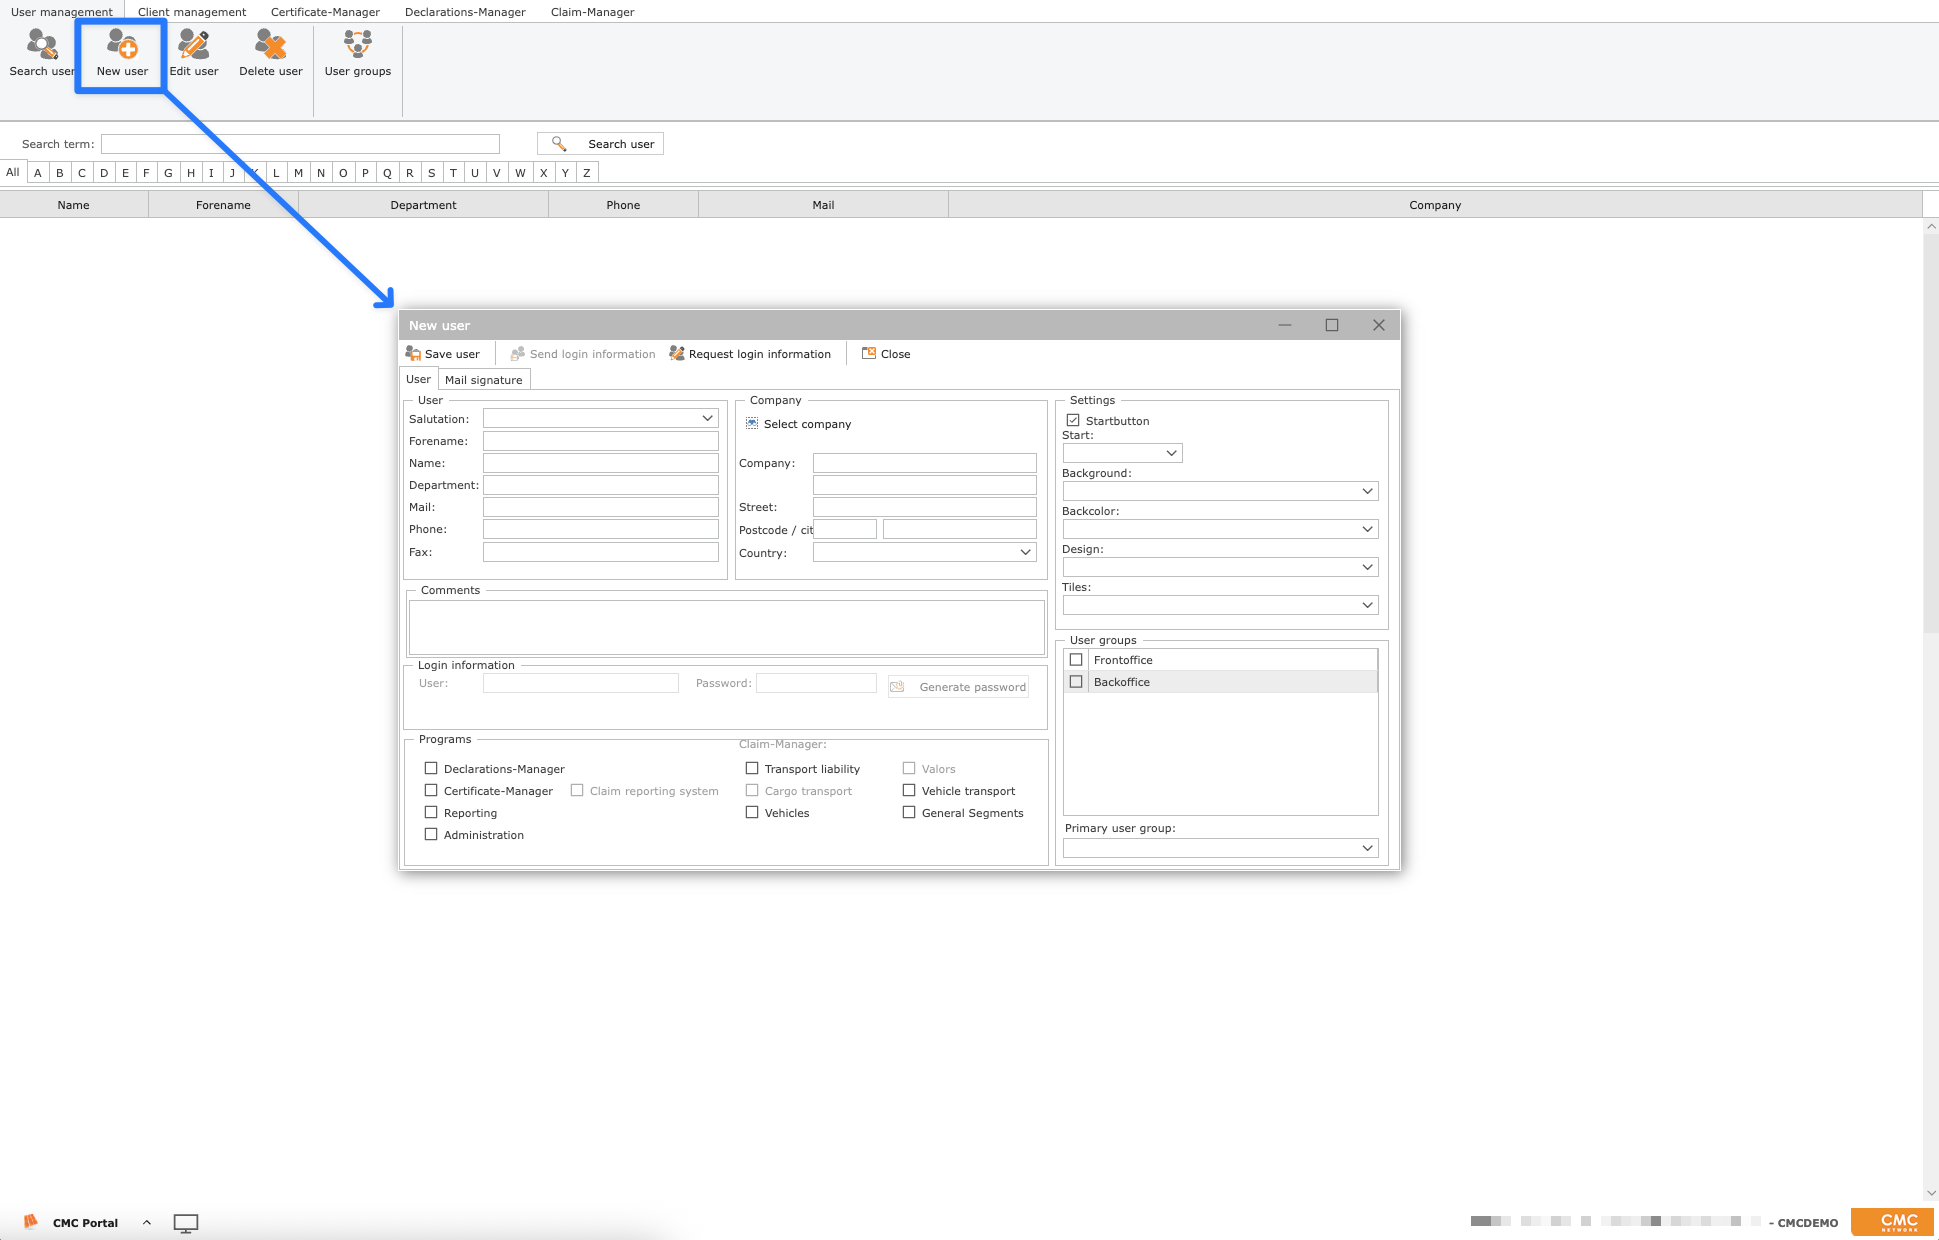
3. Assign programs (modules)
After you have entered all the required information about the new user, select the Programs (Claim Manager Modules) to which the user should have access. This selection is made below.
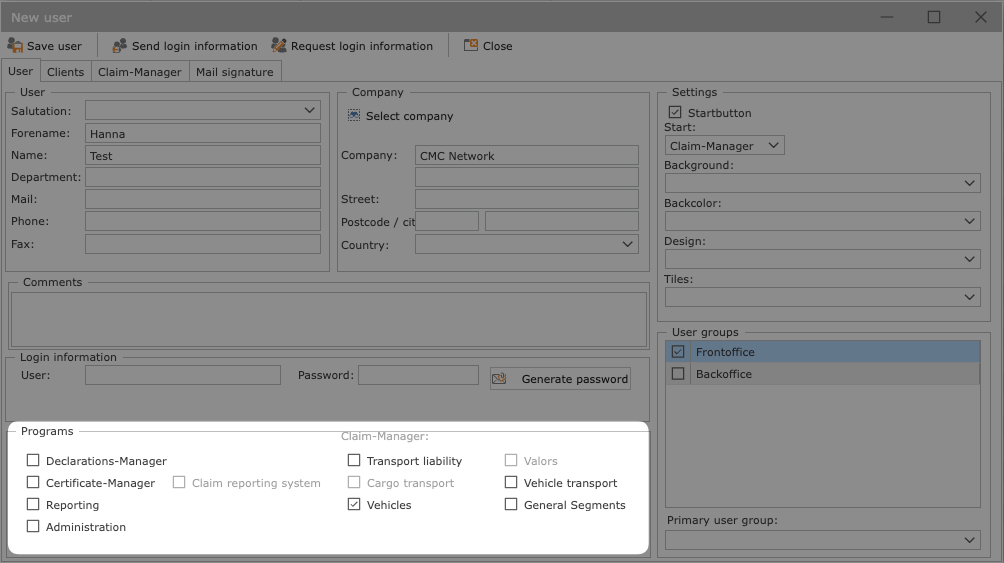
Inactive programs on your system are grayed out and cannot be selected.
Please note:
The allocation of the programs is only possible before saving the user for the first time.
If changes to the program assignments are necessary at a later date, please contact the CMC Support Team.
4. Assign client rights
Once you have selected one or more programs, the "Clients" and "Claim-Manager" tabs will be activated.
In the tab "Clients", you can assign specific permissions to the user for your clients. The following rights are available:
R = Reading rights
W = Writing rights
X = Access to reporting
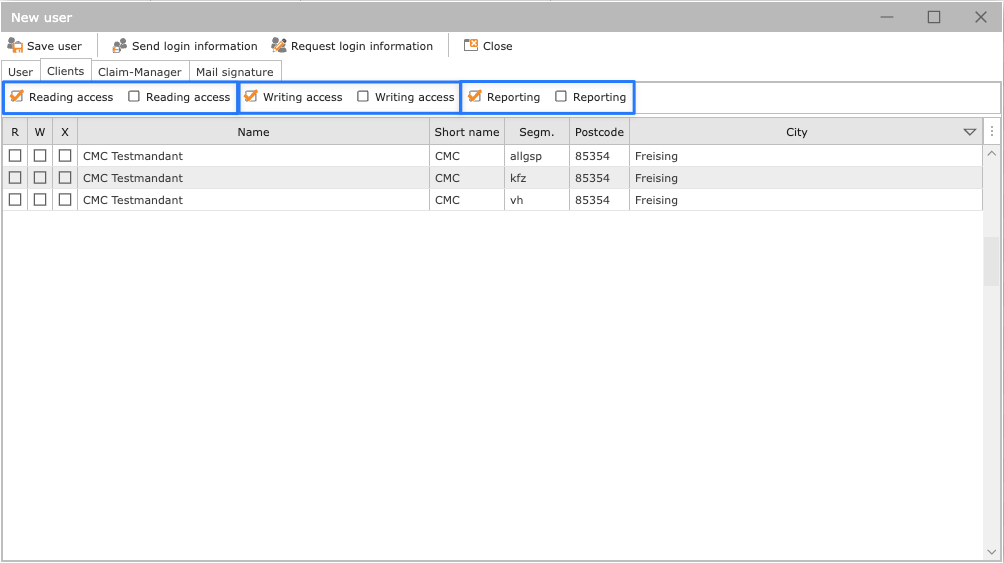
To manage the rights efficiently, you can use the buttons above the client list. This allows the respective authorizations to be for all clients at the same time or withdraw.
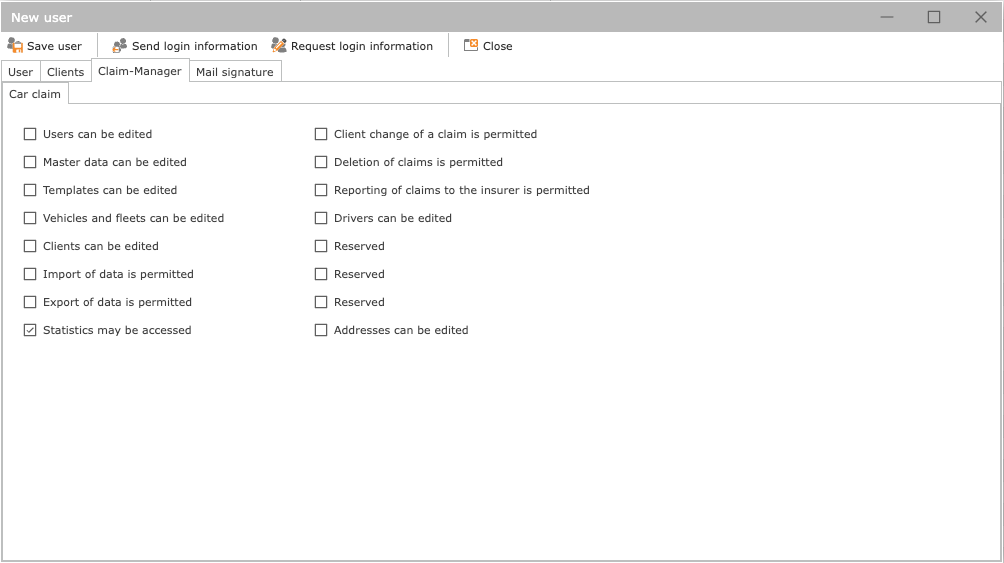
5. Extended rights in the Claim Manager
In the tab "Claim-Manager", you can adjust the user's access rights even more specifically. Here, you define which specific functions within the individual modules should be available to the user.
For example, you can:
allow Editing addresses in the address overview,
prevent deletion of claims by not activating this permission.
These specific settings enable precise control of user rights and ensure that each user can only use the functions that are necessary for their tasks.
6. Request login information
Before you save the new user, you have the option of sending an automated email to the CMC Support Team via the "Request login information" button. This message contains all relevant information about the user creation and is used to activate the user account.
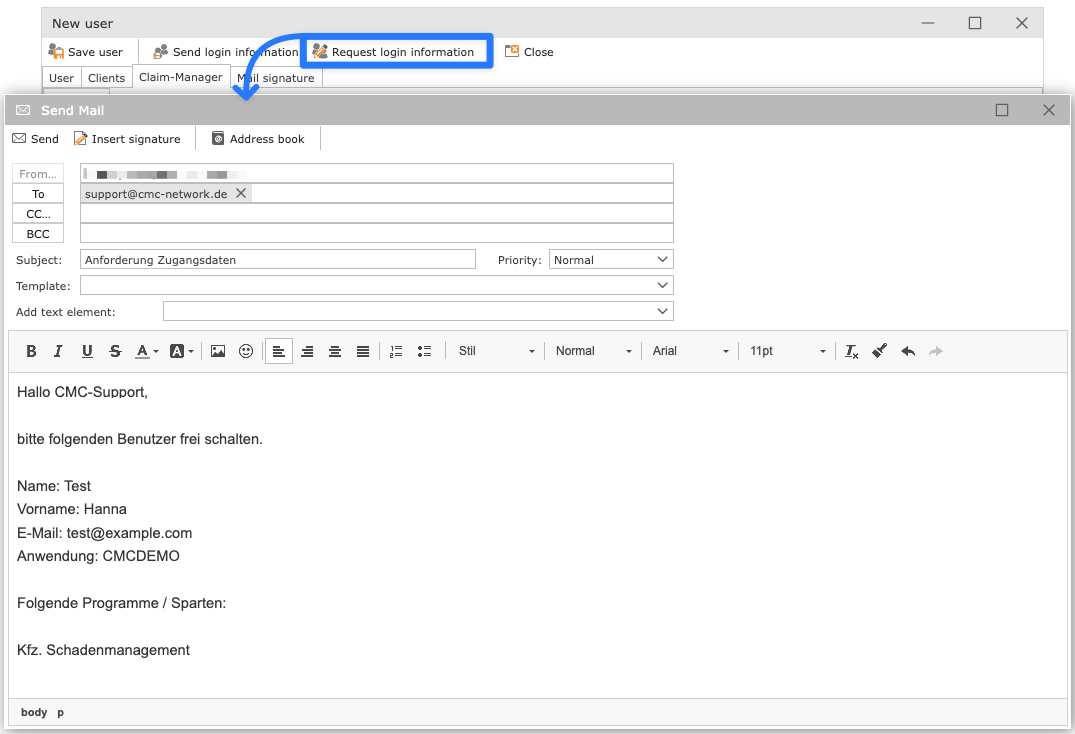
If you use the "Request access data" only after the first save of the user, the no information about the selected programs to the support team.
In this case, please write the desired programs manually into the mail bodyso that the support team can perform user activation correctly.
7. Save user
After you have provided all the necessary information, assigned the programs and assigned the desired permissions, complete the process by clicking on the "Save user" button.
This creates the new user in the system. If you have used the "Request login information", the support team is automatically informed about the user system and can activate it.